Building a Li-Ion battery pack requires a lot of battery fundamentals. And to hand wash the needs of battery balancing and protection circuits, learn about the various series and parallel configurations and configure them yourself.
Still, it can be a daunting process for someone assembling a battery pack for the first time, as we've been told that improper handling can lead to fires or short circuits or explosions. So how do you build a safe and stable 18650 battery pack? Fortunately, fuspower has a very comprehensive guide for designing and building a lithium-ion battery pack with cylindrical 18650 cells.
Here is an exhaustive guide to help you build your own 18650 package:
Step 1: Gather Materials and Tools
To build an 18650 battery pack you will need the following materials and tools:
18650 Li-ion battery (the number of batteries depends on the voltage and capacity required by the battery pack)
Battery holder or battery pack (with connections for battery positive and negative terminals)
Soldering Iron and Solder
heat shrink tubing
Wire cutters and wire strippers
multimeter
Optional: battery protection circuit, battery charger
Step 2: Choose your battery configuration
Before you can assemble your battery pack, you need to decide which configuration you want to use. The two most common configurations are series and parallel.
Series configuration: This involves connecting the positive terminal of one battery to the negative terminal of the next battery. This increases the voltage of the battery pack while maintaining the same capacity. For example, if you connect four 3.7V batteries in series, you will have a 14.8V pack with the same capacity as a single 3.7V battery.
Parallel configuration: This involves connecting the positive terminals of all the batteries together and the negative terminals together. This maintains the same voltage but increases the capacity of the battery pack. For example, if you connect four 3.7V batteries in parallel, you will get a 3.7V battery pack with four times the capacity of a single 3.7V battery.
Step 3: Prepare the Batteries
Before you connect the batteries, you want to make sure they are both in good condition and have a similar capacity. You can test the voltage of each battery with a multimeter and discard any that are damaged or have a significantly lower voltage than the others.
Step 4: Connect the battery
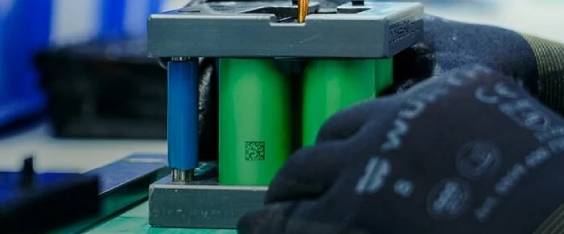
Using the chosen configuration, connect the batteries in series or parallel using wires and a soldering iron. Be careful not to short the battery or apply excessive heat as this can damage the battery.
Step 5: Add Battery Protection Circuitry
If you are building a large battery pack, it is recommended to include a battery protection circuit to prevent overcharging or overdischarging the batteries. This circuit can be purchased separately and connected to the battery pack.
Step 6: Add Heat Shrink Tubing
After connecting the battery and protecting the circuit, cover the battery pack with heat shrink tubing to protect the connections and prevent short circuits.
Step 7: Test and charge the battery pack
Test the voltage and capacity of the battery pack with a multimeter. If all is well, you can charge the battery pack with a compatible charger.
Especially for your new project, it requires a combination of theory and practice. If you can't complete all operations independently, you can contact Fuspower professional engineers to design and produce 18650 battery packs for you.
Please follow these steps carefully and take the necessary safety precautions to ensure that the final product is safe and secure.
Post time: Mar-31-2023